

We’re doing a lot during Website Photography Month to encourage website administrators to take great photos and publish them on their websites.
One of the problems that happens often when people add photos to their websites, is the photos dramatically slow down the load time of their websites.
This not only makes for a bad user experience and causes people to leave the website early, but it is also bad for search rankings. Google has stated that page speed is a search ranking factor.
In fact, un-optimized images are almost always the number one problem causing a website to load slowly. So, how do you optimize photos for better load times and better search rankings?
1) Determine the best width for each photo
The bigger a photo is, the larger the file size and the longer it will take to load. So, it’s best to make your photos as small as you can. However, if you make a photo smaller than the space it is placed in, it will look pixelated or blurry. Therefore, it’s recommended to resize photos to the size of the content area they’ll be in.
One thing that makes this tricky is many websites today are responsive, which means they automatically resize depending on the size of the viewers web browser.
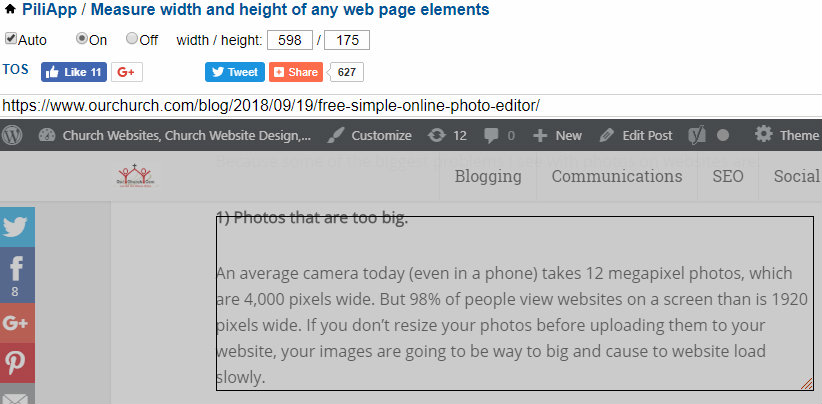
Maximize your web browser to the full width of your computer screen. Then measure the width of the content area using this online tool that can measure anything on any web page.
As you can see in the screenshot below, the width of the content area of this blog is about 600 pixels.
If you are adding a photo to an image slider or to the background of a page that spans the full width of the web browser, we recommend an image width of 1,920 pixels. Currently about 98% of people use a screen that is 1,920 or smaller.
2) Resize the photo
Previously I wrote about my favorite free, online image editing tool, Pixlr, which you can use to resize images in less than a minute.
The vast majority of the time, we recommend resizing photos to the width of the content area as we explained above.
One exception to this is if you need to fit an image in a small content area (like this blog post) but you want people to be able to click on the image to see a larger version of it. In this situation, if the image is larger than 1,920 pixel wide, it’s still best to resize it to 1,920
3) Optimize the file format and quality
If a photo is saved in the .PNG format, saving it in the .JPG format can reduce the file size of the photo by 70-90%. The JPG image format also has a quality setting which many tools, including Pixlr, allow you to select. The lower the quality, the lower the file size, so there is a trade-off. But most photos can be saved with a quality setting of 70 to 85% without a noticeable decrease in quality to the viewer.
Remember…
We’re obsessed with speed. -Google
A good tool for evaluating your website’s load time, is the Pingdom Website Speed Test.
We here at OurChurch.Com are also obsessed with speed because it leads to better search rankings and better living out your mission online. If we can help you with the SEO of your church website or Christian website, let’s schedule a time to discuss it – no cost, no obligation.
Are the photos on your website optimized for speed? Post a comment and let us know.